Home updates typically consists of new flooring, cabinets, fixtures and paint colors. When working with homes built between 1940s-1990’s, they more than likely have popcorn ceilings, which was quite popular, as it was easy to hide any little imperfections. Downfall is that they easily built up dirt and dust. So before making any updates to your home, your ceiling is a great place to start.
If your home was built before 1980’s, your popcorn ceiling might contain asbestos, which is a known cause of lung cancer. You can simply contact the health department ask about getting a sample tested for asbestos. If you do have asbestos, you can either hire an asbestos abatement contractor to help remove the popcorn ceiling, or you can cover your ceiling with panels, tongue and groove planks or vinyl paint.
Test Scrape Ceiling– Take a small space and scrape some of the popcorn ceiling off. Sometimes, it might come off better if you wet the surface. If the ceiling has been painted, water will not be able to soak in, which will make this job very difficult. However, you do have the option to do it yourself, hire it out, or cover the popcorn ceiling.
Prep The Room– Since we are starting from the top, you can expect a big mess below. Remove all furniture, light fixtures and fans, and cover everything else with plastic drop clothes. Tape plastic along the ceiling line, from wall to wall, corner to corner. Plastic will make the cleanup process much easier than cloth drop cloths. Place newspaper in recessed lighting spaces, and cover with tape to protect them from water spray. Make sure the power to those fixtures is off at the breaker panel.
Wet The Surface– By dampening the popcorn ceiling, this not only makes it easier to scrape, it also limits the amount of dust in the air. You will want to do this in small sections. Once the ceiling is damp, allow it to sit for 15 minutes to soften. Avoid saturating the ceiling, as it can damage the drywall and loosen the joint tape. This process might need to be repeated if the texture hasn’t soften. Again, if the ceiling has been painted, it will not absorb water easily. Therefore, you will need to dry scrape, or cover your ceiling.
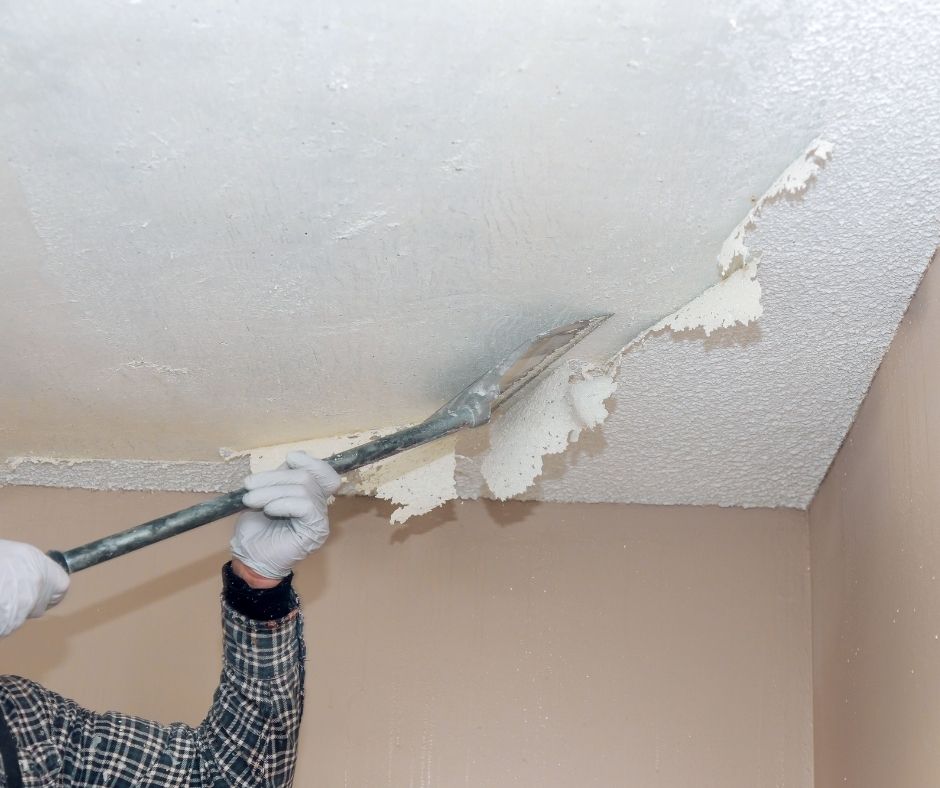
Scraping– When doing this project on your own, scraping is done in small sections, with a putty knife (or drywall taping knife). To prevent gouging the ceiling, you can dull the edges. To help limit the mess, you can use a mud pan to catch the scrapings, and clean off your knife. Once the room is finished scraping, you will probably have some dings to fix, and will have to sand the ceiling to get it smooth.
Ceiling Options– Just like everything in a home, you have options when it comes to the look of your ceiling. For smooth and sleek, you can go with the standard drywall ceiling. The only downfall, it will show every little imperfection. You can also go with a tin ceiling, drop ceiling, or textured ceiling. Texture ceiling options include: Skip Trowel (stucco look), Knockdown, Orange Peel, Swirled Ceiling, ect.
Removing popcorn ceilings is a dirty mess, but an upgrade worth making. When you are ready to start the process, give Crew Construction and Restoration a call, and we will walk you through our process, from start to finish. For all of your home remodeling projects, you can count on Crew to get the job done!